
Teams files and folders that are in the "Files" tab of a channel can be synced to
your computer via OneDrive so that you can more easily access them. This guide will
show you the steps to sync a channel's files to your computer's file explorer and
then safely stop syncing when you no longer need them.
This guide requires that you have OneDrive and Teams installed on your computer. For
college owned devices, these apps should already be installed and logged into your
BCC accounts. Here is a link to our guide for Getting Started in Teams.
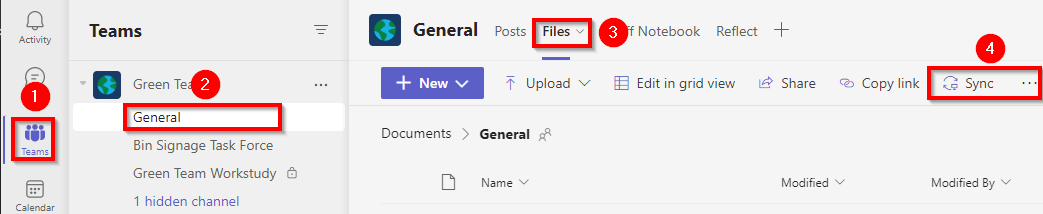
Choose the Channel You Would Like to Sync
- Open the "Teams" panel and open select the appropriate Team.
- Click on the "Channel" that has the files you would like to sync.
- Click on the "Files" tab.
- Click on "Sync" to start syncing the channel's files to your computer. If there isn't a
"Sync" button, you may need to click on the "..." button to access the "Sync" button.
- After clicking on "Sync" you may see OneDrive window briefly popup and then disappear. This is normal. If you aren't logged into OneDrive, this window will prompt you to log in.
- You can dismiss the "We're syncing your files" popup.
Access the Files on Your Computer
Almost immediately after clicking on "Sync" the folder should show up in your computer's file system.
- Open your computer's file explorer. On a Window's device, this can be accessed through
the
 on the taskbar.
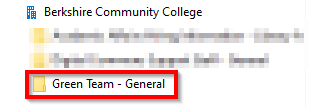
 - The files will be under the "Berkshire Community College" heading in the left navigation
window. They folders are named "Team Name - Channel Name".
- Any changes you make to these files and folders will be reflected in Teams. In some cases, you may not be able to move or rename certain files or folders. If you add a file or folder, it will be added to Teams.
Depending on the number of files and the speed of your internet connection, it may take some time for all of the files and folders to sync and become available.
Important: If you no longer want the files synced to your computer do not delete the files or folders before telling OneDrive to stop syncing, this may delete them from Team for everyone.
Safely Remove or Stop Syncing Files
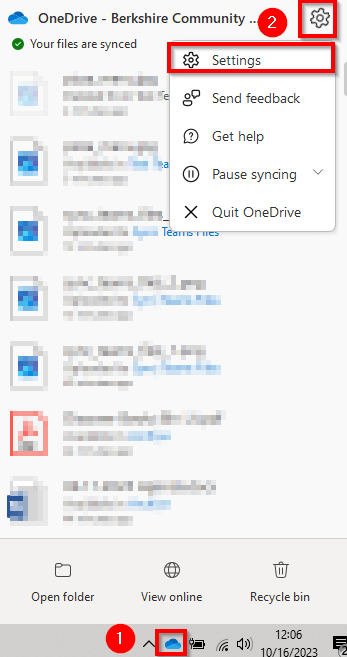
To stop syncing files, we will need to use the OneDrive app installed on your computer.
- Click on the OneDrive icon on your taskbar.
- Click on the gear icon and then click on "Settings" to access your OneDrive settings.
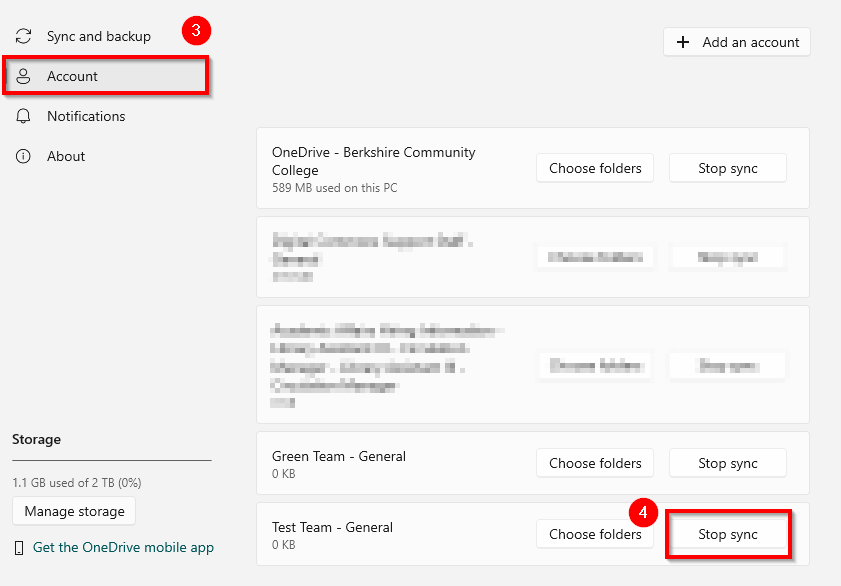
- Once the "Settings" window opens, click on "Account."
- Find the Team and Channel that you would like to stop syncing and then click on "Stop sync".
Once OneDrive has been told to stop syncing, your system should automatically remove any files that were not stored locally on your computer. You can then delete any remaining files that weren't automatically removed.