
How to Download and Install Microsoft Office 365 on Your Windows PC
Students, faculty, and most staff have access to download and use Microsoft Office 365 free of charge through BCC's campus licensing agreement with Microsoft. The following steps show how to download and install Office 365 on your personal Windows PC.
Note: An active internet connection is needed throughout all the steps below to install Office 365. We recommended a broadband or faster internet connection as the download is quite large.
Tip: Some new computers come with a trial version of Microsoft office already installed. In this case you can skip the lengthy download and simply log in with your BCC credentials as described in step 9.
- Log in to your BCC email account
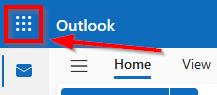
(see our full directions for logging into BCC email) - Click on the App Launcher icon in the upper left corner of the BCC email web page as shown here
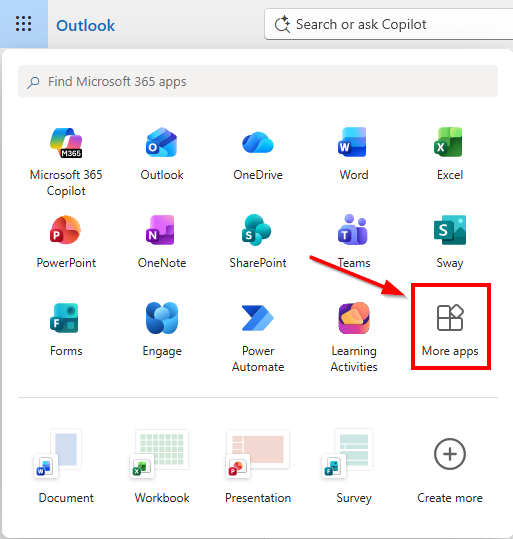
- In the menu that opens, click on More Apps - and a new page will open
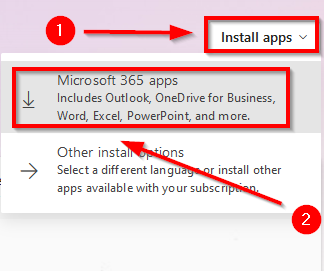
- On the new page, click on Install apps, then click on Microsoft 365 apps to begin the download
Note: If there is only an option to install Skype and not the full Office 365, please contact the Digital Commons or BCC IT Help Desk so that the licensing can be fixed on your account. This happens often with inactive accounts that return.
- When the download pop-up appears, click on Save File to begin downloading the Office 365 installer application
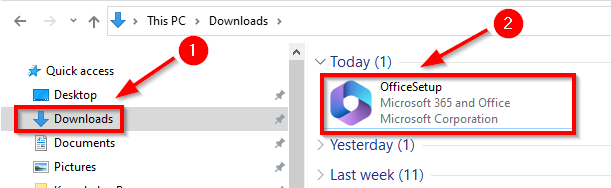
- Open This PC (or My Computer), then go to the Downloads Folder. Double-click on the application(.exe) that you downloaded within the previous step to begin installing office 365. What
you will see is similar to the example below. You can also start the installation
process by clicking on the file in your browser's download list.
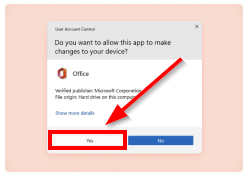
- When asked whether or not you wish to install, click Yes to accept and start installing.
- Be patient during the install process and keep an active internet connection.
Note: How long this step takes depends on your internet connection speed and the speed of your computer. On slow computers or connections this step may take 90 minutes or longer.
- After installation is complete, start any of the new Office Programs (Word, Excel, Powerpoint, etc.) and sign in with your BCC email address and password to activate the Office 365 software.
Tip: For help with installing Office 365 please visit the Digital Commons located within the Ruth Edmonds Hill Library.