
OneDrive is a great tool for sharing and collaborating especially with other students, faculty, or staff at BCC. Everyone at the college has access to OneDrive with up to one terabyte of included storage space! Your BCC OneDrive is a great place to save your student work. Here are the steps used to share a file or folder in OneDrive.
NOTE: The instructions here were made with OneDrive via the web. If you are using the OneDrive installed client the steps are the same but may appear a little different on your screen from what is shown here.
- Log in to your BCC OneDrive. For step-by-step instructions how to login please see our OneDrive Basics article.
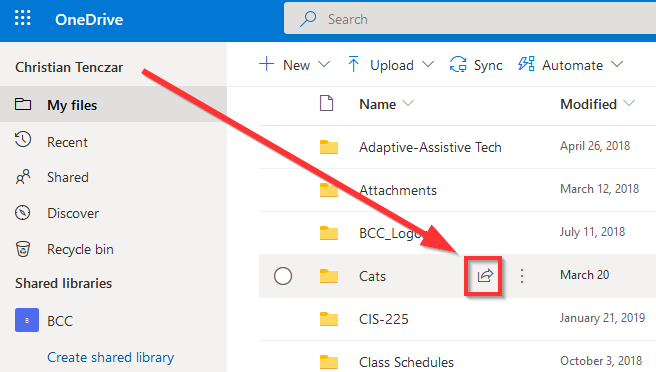
- Click on the share icon next to the file or folder you wish to share.
TIP: Sharing a folder allows you to share all the contents of that folder including other sub-folders. You can easily share additional items by moving or copying them into the shared folder without having to adjust the settings.
- Choose your sharing permissions. Click on "Anyone with the link can edit" and change it to "Specific people," this choice allows you the most control over who can and cannot see your file or
folder.
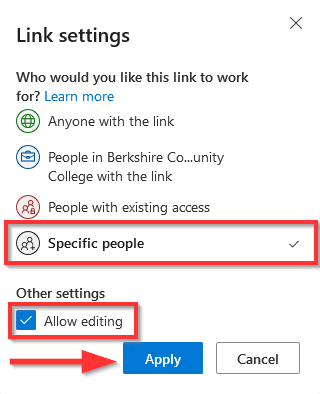
- Click the "Allow editing" box to select whether editing will be allowed by the individual(s) you are sharing with. If the box is checked they will be able to make changes to your document. When finished with steps 3 and 4, click the Apply button.
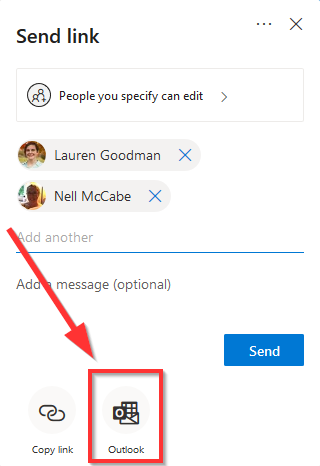
- Enter the names or email addresses of the individual(s) you want to share your file or folder with. Start typing their
name in the box and it will begin to search the BCC directory. You can share a file
or folder with as many people as you wish.
TIP: To share files or folders with individuals outside BCC use their entire email address.
- Do not click the Send button, instead click on Outlook. This will give you the opportunity to write a custom note about the file or folder
to the individual(s) you are sharing with and helps make the notification appear less
"spammy." It also creates a link within your email directly to the shared folder.
NOTE: If you did click the Send button it's OK. A share notification will still be sent however you won't have the opportunity to create a custom message. The standard built-in message can sometimes look like spam especially if the recipient isn't expecting to receive any files from you. If this happens it might be a good idea to follow up with another email explaining the files you shared.
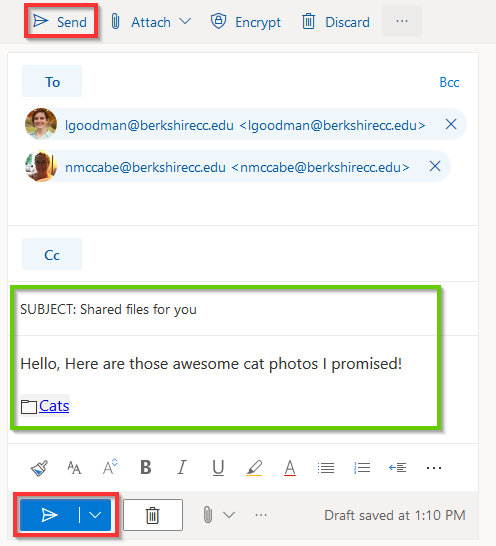
- Click the Send button when finished writing your custom message.
Note: While this is our recommended method for sharing files or folders in OneDrive there are several other ways which accomplish the same goal. If you find a method that works for you keep using it!