
Did you know that Microsoft Teams has a built in Calendar that offers a more streamlined and user-friendly process for scheduling meetings than the Outlook app? In this guide we'll be giving an overview of the meeting creation process while showcasing some of its best features. For the purposes of this guide, the terms "Meeting" and "Event" will be used interchangeably.
Accessing the Calendar
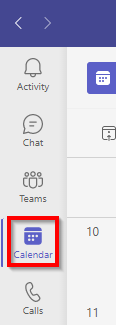
To access the "Calendar" panel in Teams, click on the "Calendar" icon on the left side of the screen.
Create a Meeting
To create a meeting, you can click on any empty space on your calendar or click on the "New meeting" button in the top right corner. Alternatively, if you need to
start a Teams meeting right away, you can click on "Meet now" instead.
After clicking on "New meeting" the scheduling panel will pop-up in the middle of your screen.
Meeting Settings
The new panel will open to the meeting "Details" tab. Here, you will add all the details
for your meeting and configure any settings. The date and time will either match the
time that was clicked on the calendar, or if clicking on the "New meeting" button,
the next half-hour block that day.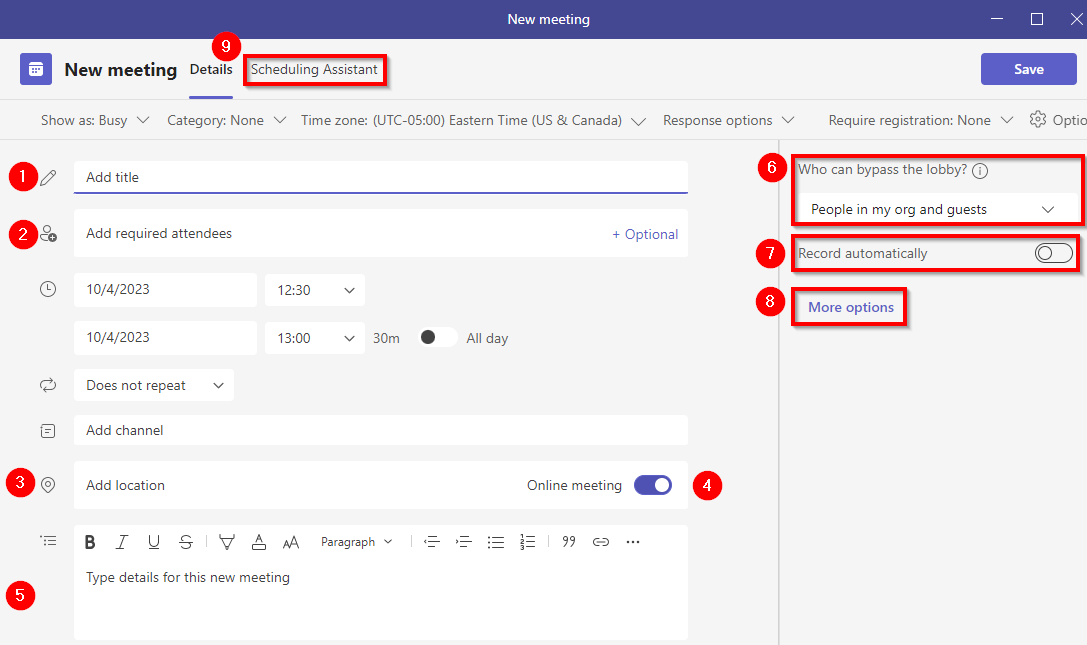
- Type a meaningful title for your meeting.
- Type the names or usernames of any required attendees in this field. As you type, members of your organization will start to auto-fill. Click on the user in the dropdown menu or press the "Enter" key to select the user at the top of the list. You can add multiple attendees.
- Type the location for your meeting. For entirely virtual meetings, leave blank.
- Click on the toggle button to add or remove the online component from your meeting. If you have scheduled an in-person meeting, this can be enabled to also have a online or virtual option.
- Type a description for your meeting. This could include the agenda, links to documents, or any other additional details.
- By default, attendees are able to join the meeting directly, bypassing the lobby. Click to access the menu. Options go from least to most restrictive.
- Click on the toggle button to enable automatic recording.
- Click on "More options" to access advanced settings and options for your meeting including whether or not mics or cameras are allowed for participants, adding co-organizers, and enabling or disabling reactions. Once the initial invite has been sent, the options menu visible in this screenshot will be replaced with the "Tracking" panel which details the RSVP status of your invitees. The meeting options can be accessed again along the top bar, though sometimes the option is hidden in the (. . .) menu on the far right of the settings bar.
- Click on "Scheduling Assistant" to open the Scheduling Assistant tab. This tab will help you find a meeting time that is open for all of your attendees. Alternatively, you can click on "Save" or "Send" in the top right corner to publish the meeting and send invites.
Scheduling Assistant
The Scheduling Assistant is a powerful tool that will help you find a time that works
for all of your required or optional attendees, as long as their calendars are up to date. 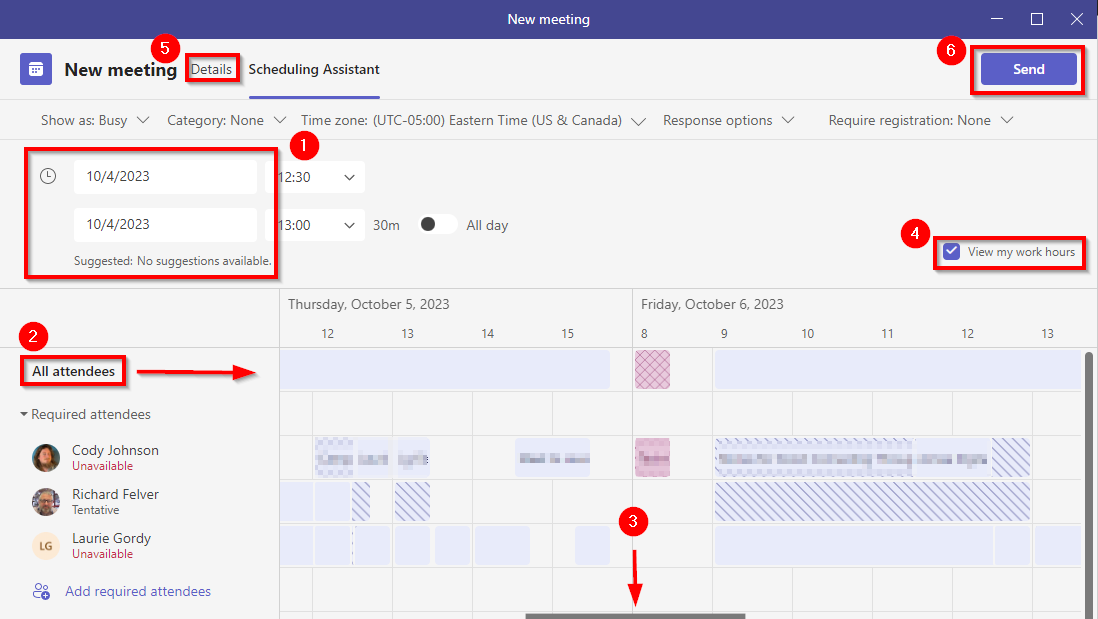
- Click on the dates or times to manually select a different meeting time. The "Suggested" times only looks at the current date selected. If no times are available, select a different date.
- The "Scheduling Grid" will show you the availability of your various attendees. At
the top of the grid, the "All attendees" row will show the aggregate of all of the
calendars. Here is a key to help decipher the different blocks on the scheduling grid.
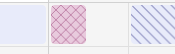
Shaded - event flagged as "Busy" on a calendar.
Crossed lines - event flagged as "Out of Office" on a calendar.
Blank - indicates an available time.
Single lines - event flagged as "Tentative" on a calendar.
Clicking on the "Scheduling Grid" will move the meeting date and start time to the nearest 15 minute increment of your click. - You can use the scroll bar at the bottom of the window to scroll left or right to different days.
- By default, the scheduling grid is limited to your working hours that are configured in your Office 365 account. Click to disable this option and show 24 hours per day on the grid.
- Click on "Details" to go back to the previous tab and change any of your meeting details.
- If you are happy with your meeting details and settings, and have found a suitable time using the scheduling grid, you can click on the button in the top right corner to save/send your meeting. The button will read "Send" if you have added any attendees or "Save" if you have not. "Send" will send invites to all of your attendees.
View, Edit, Join, and Respond to Meetings
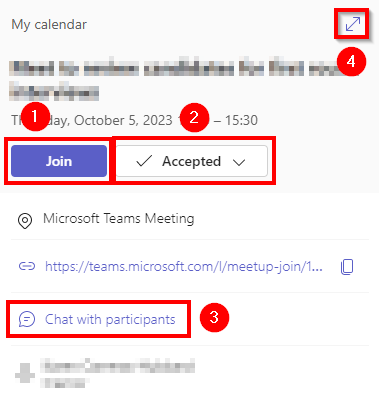
Back in the "Calendar" panel, you can click on any of the events on your calendar to view the event and it's details.
| Events you organized | Events you were invited to |
|---|---|
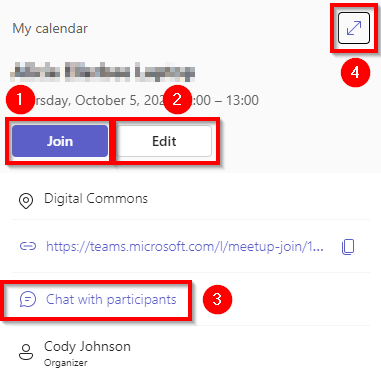 |
 |
|
|