
Adding Images to a Lightbox Gallery
What is a Lightbox Gallery?
A Lightbox Gallery is an activity in Moodle where your instructor may ask you to upload images, either for a standalone assignment or throughout the semester, that will be visible to the rest of the class. In this guide, we will be covering the steps for uploading and adding your images to a Lightbox Gallery.
Important: Your instructor may have an individual Lightbox Gallery created for each student, so always check that you are uploading to your gallery if that is the case.
Uploading and Submitting Images
The first step for uploading your images is to determine where they are located in your computer's file system. Common locations include your Downloads folder, Desktop, or a specific folder you've created for your coursework. You may even have emailed them to yourself or have them stored in the "cloud." Once you know where your images are saved, follow the steps below to add them to the Lightbox Gallery.
Step 1: Navigate to the Lightbox Gallery activity in your Moodle course and scroll through the assignment prompt until you encounter the Add images button. Click the Add images button to begin.

Step 2: The page will refresh and display the file upload interface. Similar to other activities in Moodle, click on the + button in the top left corner to open the Moodle File Picker where you will select your files for upload. Worth noting on this screen are the maximum file size and accepted file types; if you are unable to upload a specific image, the first thing to check is that it meets these specifications.

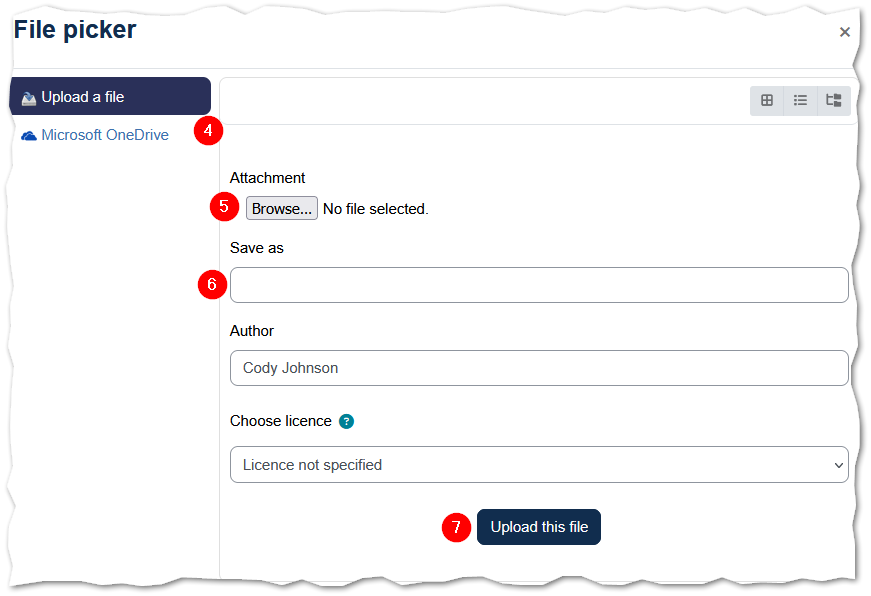
Step 3: The File picker dialog will open. You will see options to upload a file from your computer or from Microsoft OneDrive on the left-hand side. To upload from your computer, make sure Upload a file is selected.
Step 4: Click the Browse... button to open your computer's file explorer and locate the image you want to upload.
Step 5: After selecting your file, you may optionally enter a name in the Save as field. The Author field will automatically populate with your name, and you can leave the license setting as-is unless your instructor specifies otherwise or you would like to apply specific license rights to your work.
Step 6: Click the Upload this file button to add the image to the file browser area.
Step 7: If you need to upload additional images, repeat Steps 2 through 6 for each file.
Once all of your images appear in the file browser area, click the Add images button to submit them to the gallery.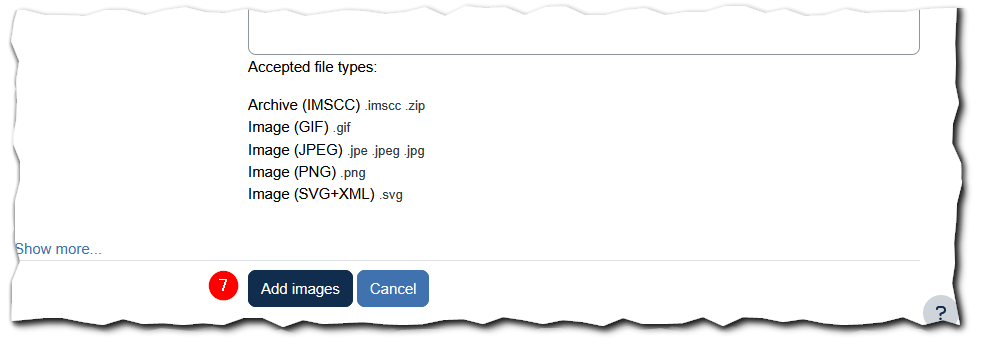
Adding More Images Later
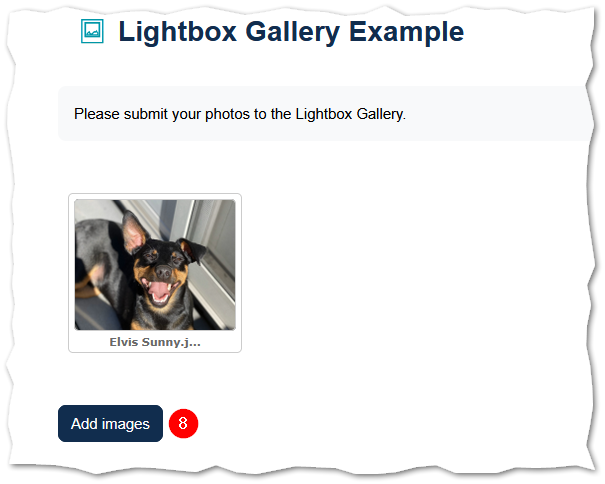
If you need to add more images to the gallery at a later time, simply return to the Lightbox Gallery activity. Your previously uploaded images will be displayed as thumbnails. Click the Add images button below your existing images and follow the same upload steps outlined above.
Using a Smartphone or Tablet?
Because our smartphones and tablets have cameras built-in, for many folks it may be easier to upload your images directly from your smart-device rather than transferring them to your computer first. While there is an app for accessing Moodle on your device, in most cases you will need to use your device's built-in web browser to access the web-version of Moodle for Lightbox Galleries to work correctly. Mobile navigation can be a little different depending on device settings, so if you experience any issues please reach out to our team and we will do our best to assist you!
Tips
- Check your file format before uploading. The Lightbox Gallery accepts GIF, JPEG, PNG, and SVG image files. If your image is in a different format (such as HEIC from an iPhone), you will need to convert it before uploading.
- Keep file sizes reasonable. While the maximum upload size is 100 MB per file, large files may take longer to upload. Resizing very large images before uploading can help.
- Use descriptive file names. Recall Step 5: it may be helpful or in some cases required to rename your images as most will upload with a default name of "img12345" or something similar.